27 Professional Headshot Tips for Realtors to Win More Clients
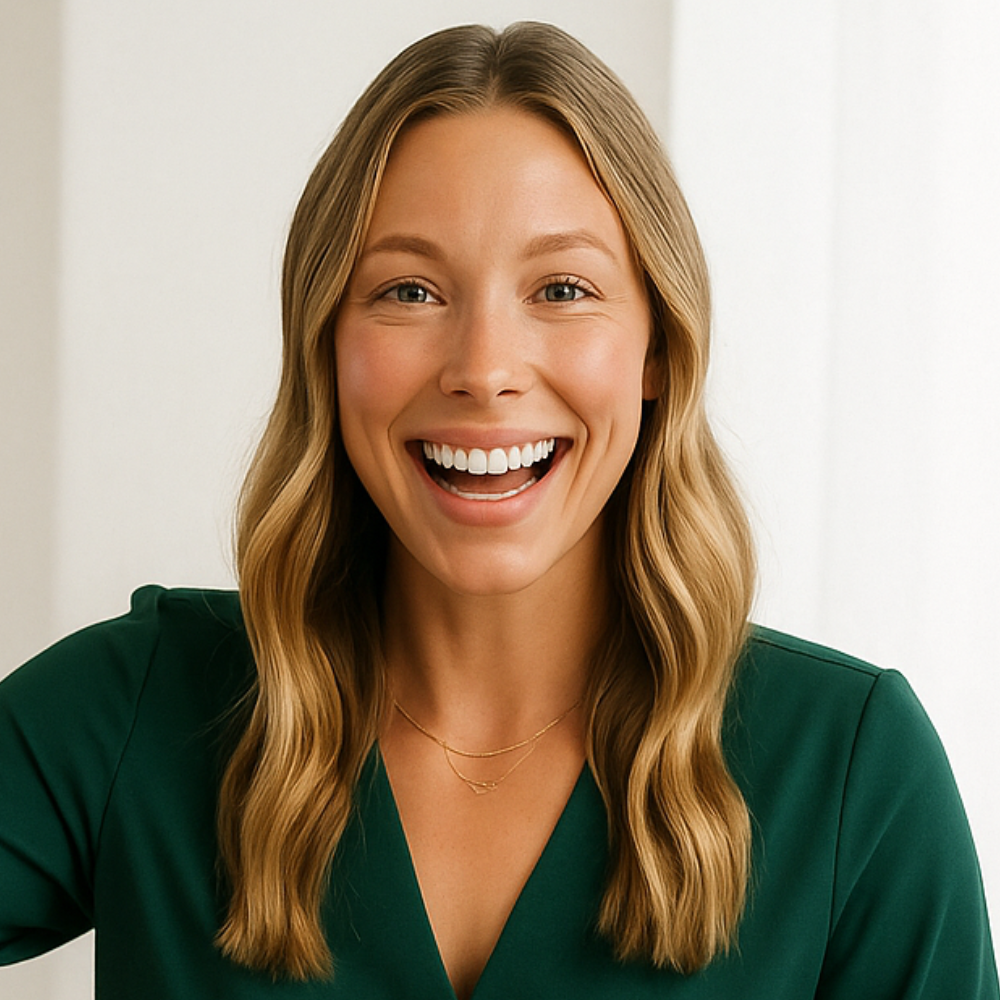
In real estate, your first impression is often digital. Before a client ever meets you, they see your face on a business card, a bus bench, or your Zillow profile. A professional headshot is your visual handshake—it needs to convey trust, confidence, and approachability. Getting this right is crucial, which is why so many agents seek out expert tips for professional headshots. This guide provides actionable advice to help you capture an image that not only looks great but also works as a powerful marketing tool for your real estate business.
From choosing the right outfit and mastering your pose to understanding the nuances of lighting and background, every detail matters. We'll cover the traditional route of hiring a photographer and explore modern alternatives that save time and money. Whether you're a new agent building your brand or a seasoned pro refreshing your image, these professional headshot tips will ensure you put your best face forward and connect with more clients.
Quick Guide: What You'll Learn
- Preparation is Key: Discover how to choose the perfect outfit, from color theory to fabric choices, to project a professional and trustworthy image.
- Posing and Expression: Learn simple but effective posing techniques, like the 'chin out and down' trick, to look confident and natural on camera.
- Technical Essentials: Understand the critical roles of lighting and background, and how to use them to create a polished, distraction-free headshot.
- Modern Solutions: Explore how services like Realtorheadshot.com offer a fast, affordable, and high-quality alternative to traditional photoshoots for busy real estate professionals.
- Common Pitfalls: Identify and avoid the most common headshot mistakes that can undermine your professional brand.
The Foundation: Choosing Your Headshot Approach
A great headshot starts long before you step in front of a camera. The first decision is choosing how you'll get the shot. Traditionally, this meant finding and hiring a professional photographer, a process that involves scheduling, a significant financial investment, and waiting for edited photos. While this is still a valid option, technology has introduced a powerful alternative, especially for busy real estate professionals who need quality and efficiency.
The Traditional Photographer Route
Hiring a professional photographer has its benefits. You get a personalized session with an expert who can guide you through posing and lighting. They bring high-end equipment and editing skills to the table. However, this path comes with challenges.
- Cost: A professional headshot session can cost anywhere from $200 to over $1,000, depending on the photographer's experience and location. For a realtor, this is a significant marketing expense.
- Time: The entire process—from finding the right photographer, scheduling the shoot, attending the session, and waiting for the final edited images—can take weeks.
- Limited Options: Most packages offer only a handful of final, retouched images. If you want more variety for different platforms (e.g., a formal shot for LinkedIn, a casual one for social media), the cost increases.
A Modern Alternative for Realtors: AI Headshots
For real estate professionals, time is money, and a strong online presence is non-negotiable. This is where AI-powered solutions have become a valuable tool. Instead of the lengthy and expensive traditional process, you can get a wide variety of professional, studio-quality headshots in minutes.
This is where a service like Realtorheadshot.com comes in. RealtorHeadshot.com offers a fast and affordable solution for realtors to obtain high-quality studio headshots using AI technology. The process is simple: you upload a few selfies, and the AI generates a large gallery of options. In just 5 minutes, users can receive 100 professional headshots, significantly reducing the time and cost compared to traditional photography methods.
This service provides realtors with quick and cost-effective access to professional headshots, enhancing their marketing efforts. For only $29, you get 100 different headshots, giving you an incredible range of choices for your website, social media profiles, business cards, and marketing materials. It's a solution designed specifically for the fast-paced needs of the real estate industry.
What to Wear: Crafting Your Professional Image
Your outfit is a critical component of your headshot. It communicates your brand, professionalism, and personal style. The goal is to choose clothing that enhances your appearance without distracting from your face. Here’s some headshot photography advice on selecting the perfect attire.
Color Psychology and Best Practices
The color of your clothing can influence how you are perceived. For real estate professionals, it's best to stick with colors that evoke trust, stability, and professionalism.
- Solid Colors are Best: Solid, muted colors are almost always the safest and most effective choice. Navy blue, charcoal gray, deep green, and burgundy are excellent options. They are timeless and don't distract the viewer's eye.
- Consider Your Brand: If your brokerage has specific brand colors, you might subtly incorporate them, but avoid making it look like a uniform. The focus should remain on you.
- What to Avoid: Steer clear of neons, bright oranges, and yellows, as they can be distracting and create color casts on your skin. Pure white and black can also be tricky; white can sometimes wash you out, while black can lose detail in shadows. Off-white or a dark gray is often a better choice.
Choosing the Right Neckline and Fit
The cut and fit of your clothing are just as important as the color. Ill-fitting clothes can make you look unprofessional.
- Necklines: A simple, classic neckline works best. For men, a collared shirt, perhaps with a blazer, is a standard and effective look. For women, V-necks, crew necks, and boat necks are all flattering options. Avoid turtlenecks, which can make you look constricted, and plunging necklines, which can be distracting.
- Fit is Everything: Your clothes should fit you well. A jacket that's too big can look sloppy, while a shirt that's too tight can create unflattering lines. Choose tailored pieces that skim your body without clinging. If you have a favorite blazer or blouse that makes you feel confident, that's often the best choice.
Fabrics and Patterns to Avoid
Some fabrics and patterns don't translate well on camera. To ensure a clean and professional look, keep these tips in mind.
- No Busy Patterns: Avoid small, tight patterns like houndstooth, herringbone, or tight stripes. These can create a distracting visual effect called a moiré pattern on camera. Large, bold patterns can also pull focus away from your face.
- Avoid Shiny Fabrics: Materials with a high sheen, like satin or some polyesters, can create harsh reflections under studio lighting. Stick to matte fabrics like cotton, wool blends, or high-quality knits.
- Keep it Timeless: Avoid overly trendy items. Your headshot should have a long shelf life, and choosing classic styles ensures it won't look dated in a year or two.
Mastering the Technicals: Lighting and Background
Even with the perfect outfit and a confident smile, poor lighting or a distracting background can ruin a headshot. Understanding these technical elements is crucial for a professional result. Whether you're working with a photographer or learning how to take headshots yourself, these principles apply.
The Power of Natural and Professional Lighting
Lighting is arguably the most important technical aspect of any photograph. It shapes your face, creates mood, and ensures a clear, high-quality image.
- Soft Light is Flattering: The best light for headshots is soft and diffused. This type of light minimizes harsh shadows, reduces the appearance of blemishes, and creates a pleasant, even look. Professional photographers use softboxes or umbrellas to achieve this. If you're taking your own photos, position yourself facing a large window on an overcast day. The clouds act as a natural diffuser.
- Avoid Direct, Harsh Light: Direct sunlight or a bare flash creates hard shadows and bright hotspots, which are unflattering. It can make you squint and highlight every imperfection. Never take a headshot in the middle of a sunny day with the sun directly overhead.
- Catchlights in the Eyes: Good lighting will create a small reflection of the light source in your eyes, known as a catchlight. This adds life and sparkle to your expression, making you look more engaged and vibrant. A professional photographer will know how to position lights to achieve this, but you can get a similar effect by facing a window.
Choosing a Background That Complements, Not Distracts
The background of your headshot should support the image, not compete with it. The focus must remain on you.
- Simple and Uncluttered: The best backgrounds are simple. A solid, neutral-colored wall (gray, beige, or muted blue) is a classic choice. A slightly out-of-focus office environment can also work well for a real estate agent, as it provides context without being distracting.
- Avoid Distractions: Make sure there's nothing in the background that pulls the eye away from you. This includes bright colors, complex patterns, other people, or clutter. Before the shot, scan the entire frame to ensure the background is clean.
- Consistent with Your Brand: The background should align with the professional image you want to project. A sleek, modern office background conveys a different message than a warm, residential setting or a clean studio backdrop. Choose one that reflects your target market and personal brand.
Posing with Confidence: Headshot Photography Advice
How you pose can make the difference between a headshot that looks stiff and awkward and one that appears confident and approachable. You don't need to be a model to master a few simple techniques. The goal is to look relaxed and natural.
Finding Your Best Angle
Almost everyone has a "good side." While a professional photographer can help you find it, you can experiment on your own with a mirror or your phone's camera.
- Turn Slightly: Facing the camera straight-on can look like a mugshot. Instead, angle your body slightly away from the camera (about 45 degrees) and then turn your head back toward the lens. This creates a more dynamic and flattering line.
- Lean In: Leaning slightly forward from the waist toward the camera can make you appear more engaged and dynamic. It also helps to subtly separate your head from your body, creating a stronger composition.
- Vary Your Head Tilt: A slight tilt of the head can add personality and make you seem more approachable. Experiment with tilting your head slightly to the left or right to see what feels most natural and looks best.
The "Chin Out and Down" Trick
This is one of the most effective professional headshot tips for defining your jawline and avoiding the appearance of a double chin. It might feel unnatural at first, but it looks great on camera.
- Sit or Stand Tall: Start with good posture, shoulders back and down.
- Push Your Face Forward: Imagine a string is pulling your forehead straight toward the camera. You're essentially moving your entire face forward, away from your neck.
- Slightly Tilt Down: Once your face is forward, tilt your chin down just a tiny bit.
This simple action tightens the skin under your jaw, creating a clean, defined jawline. Practice it in a mirror to get comfortable with the movement.
Natural Smiles and Expressions
Your expression is what connects you with the viewer. A forced smile is easy to spot, so the goal is to capture a genuine one.
- Think of Something Positive: Before the photo is taken, think about something that genuinely makes you happy—a loved one, a funny memory, or a recent success. This will help create a real smile that reaches your eyes (known as a "Duchenne smile").
- Don't Say "Cheese": Saying "cheese" creates an unnatural, wide smile. Instead, try saying a word that ends in "uh," like "mocha" or "yoga." This brings the corners of your mouth up in a more relaxed way.
- Practice Different Looks: You don't have to smile with teeth in every shot. A confident, closed-mouth smile can be just as effective. Try a few different expressions to see what best represents your professional persona.
Grooming and Makeup for a Polished Look
Proper grooming is essential for a professional headshot. The camera can be unforgiving, so paying attention to the small details will ensure you look polished and put-together. These tips apply to everyone, regardless of gender.
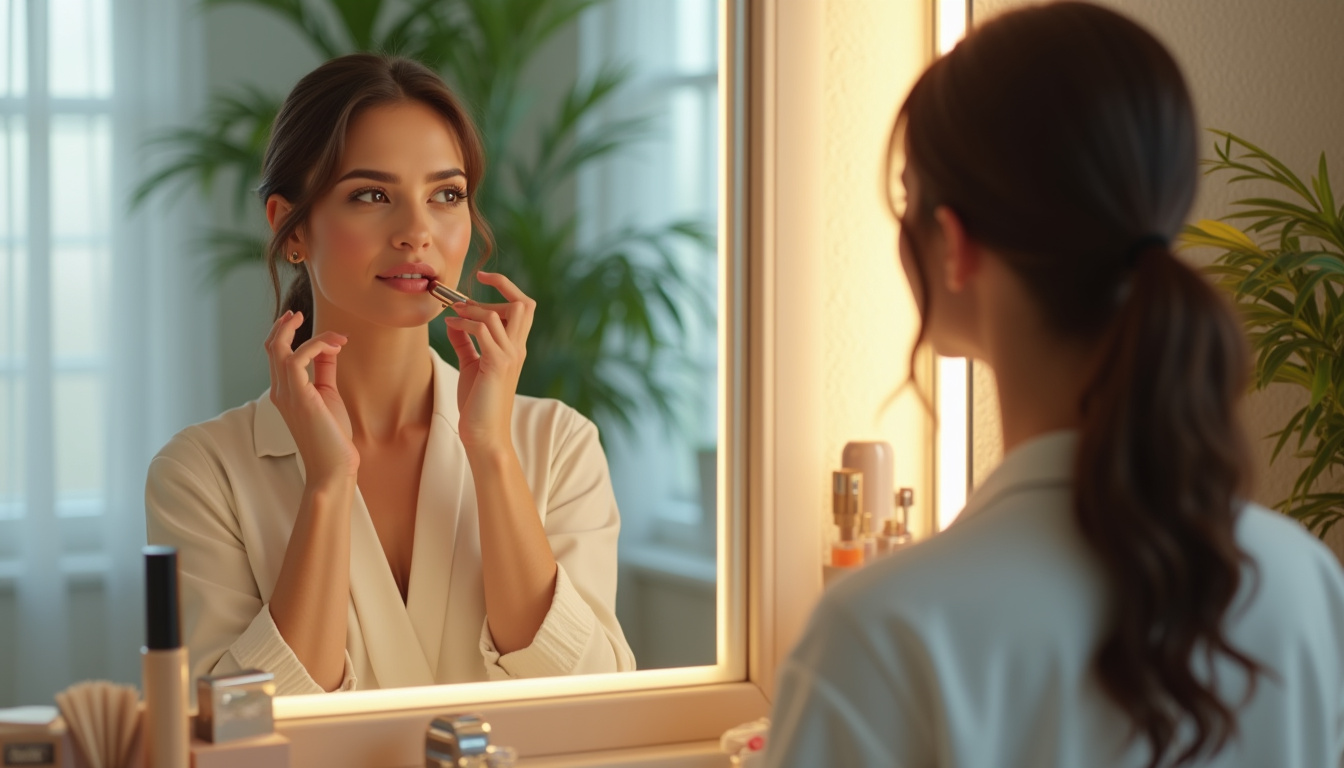
Makeup Tips for the Camera
Makeup for photography is different from everyday makeup. The goal is to even out your skin tone and define your features without looking overdone.
- Start with a Matte Base: Avoid foundations or powders with shimmer or an "illuminating" finish, as they can create shiny spots under bright lights. A matte-finish foundation will help control shine and provide even coverage.
- Define Your Features: A little extra definition goes a long way. Use a touch of blush to add color to your cheeks, fill in your eyebrows to frame your face, and apply a coat of mascara to make your eyes pop. Keep the colors neutral and natural.
- Control Shine: Even if you don't normally wear makeup, a translucent powder is a great idea for everyone. A light dusting on your forehead, nose, and chin will prevent distracting shine from the lights.
- Lip Care: Avoid glossy or overly bright lipstick. A neutral, matte, or satin-finish lip color is best. Most importantly, make sure your lips are moisturized. Chapped lips are difficult to fix in post-production.
Hair and Facial Hair Grooming
Your hair should be neat and styled in a way that feels authentic to you. Don't try a brand-new haircut or style right before your shoot.
- Tame Flyaways: Flyaway hairs can be very distracting in a high-resolution photo. Use a small amount of hairspray or anti-frizz serum to keep everything smooth and in place.
- Plan Your Haircut: If you're getting a haircut, do it about a week before your headshot session. This gives it time to settle in and look more natural.
- Facial Hair: If you have a beard or mustache, make sure it is neatly trimmed and groomed. If you prefer a clean-shaven look, get a close shave the morning of the shoot to avoid any five-o'clock shadow. Use a good aftershave balm to prevent razor burn or redness.
Selecting the Best Location for Your Headshot
The location of your headshot sets the tone and provides context for your professional brand. The three main options—studio, outdoor, or office—each offer distinct advantages and convey a different message.
Studio Headshots
A studio provides a controlled environment, which is ideal for a clean, classic, and professional look. This is the style that services like Realtorheadshot.com excel at creating with AI.
- Pros: The lighting is perfectly controlled, eliminating variables like weather. The backgrounds are typically simple and neutral (e.g., solid gray, white, or black), which puts all the focus on you. This look is timeless and highly professional.
- Cons: Studio shoots can sometimes feel a bit sterile or corporate if not done well. They don't offer any environmental context about your work.
- Best For: Realtors who want a polished, classic, and versatile headshot that can be used across all platforms.
Outdoor Headshots
Taking your headshot outdoors can create a more approachable, natural, and lifestyle-oriented feel.
- Pros: Natural light is very flattering. The background can add personality and context—for example, a blurred-out residential street or a modern architectural element can subtly hint at your specialty.
- Cons: You are at the mercy of the weather and changing light conditions. Finding a location that isn't too busy or distracting can be a challenge.
- Best For: Agents who want to project a friendly, down-to-earth brand and whose target market responds to a more casual, lifestyle aesthetic.
In-Office or Environmental Headshots
An environmental headshot taken in your office or a staged property can directly communicate what you do.
- Pros: This type of headshot immediately provides context. A shot in a modern, well-decorated office or a beautiful home can reinforce your brand and expertise.
- Cons: The background must be carefully managed to avoid clutter and distractions. Poor lighting in an office can be difficult to overcome without professional equipment.
- Best For: Brokers or team leaders who want to showcase their professional environment, or agents specializing in luxury properties who can use a high-end home as a backdrop.
Using Props to Enhance Your Headshot
In most cases, the best professional headshot doesn't include any props. The focus should be entirely on you. However, in some specific contexts, a subtle prop can add a touch of personality or reinforce your professional role. If you choose to use one, it must be done with care and intention.
- Keep it Subtle and Relevant: For a realtor, a prop could be something as simple as holding a set of classic keys or subtly leaning against a "For Sale" sign (though this can quickly look dated). A tablet showing a listing could also work if done naturally.
- Avoid Gimmicks: Steer clear of anything that feels like a cliché, such as talking on an old-fashioned phone or holding a giant key. These props can make your headshot look cheesy and unprofessional.
- Focus on Action: A better way to incorporate a "prop" is to make it part of a natural action. For example, a shot of you opening the door to a beautiful home is more of an environmental portrait than a propped headshot, and it can be very effective for marketing materials.
- When in Doubt, Leave it Out: For your primary headshot used on business cards and professional profiles, a clean, prop-free image is almost always the superior choice. It's more versatile and has a longer shelf life.
The Final Polish: Editing and Retouching Your Headshots
Editing is the final step in creating a polished headshot. The goal of retouching is to enhance the photo and correct minor imperfections, not to make you look like a different person. Authenticity is key to building trust, especially in real estate.
How to Select Your Final Shots
After a photoshoot, you might have dozens or even hundreds of images to choose from. When using a service like Realtorheadshot.com, you get 100 options right away. Here’s how to narrow it down:
- Focus on the Expression: Look for images where your expression is confident, approachable, and genuine. Your eyes should be in sharp focus and have good catchlights.
- Check for Technical Quality: Ensure the image is sharp and well-lit. Discard any shots that are blurry or have unflattering shadows.
- Get a Second Opinion: It can be hard to be objective about photos of yourself. Ask a trusted colleague or friend for their input. Ask them which photo makes you look the most trustworthy and competent.
Common Retouching Mistakes to Avoid
Good retouching is subtle. Over-editing can make a headshot look fake and unprofessional.
- Over-Smoothing the Skin: While it's fine to reduce minor blemishes or soften a few wrinkles, completely removing all skin texture looks unnatural. You should still look like a real person.
- Artificially Whitening Teeth: Teeth should look naturally white, not blindingly bright. Over-whitening is a common mistake that immediately signals a photo has been heavily altered.
- Altering Facial Features: Resist the temptation to change the shape of your eyes, nose, or jawline. Your headshot must be an accurate representation of what you look like in person.
- What Should Be Retouched: Good retouching typically includes color correction, adjusting brightness and contrast, removing stray hairs, reducing temporary blemishes (like a pimple), and slightly softening under-eye circles.
Common Mistakes to Avoid in Headshots
Knowing what not to do is just as important as knowing what to do. Here are some of the most common mistakes that can undermine the effectiveness of your professional headshot.
- Using an Outdated Photo: Your headshot should look like you do now. Using a photo that is more than two years old can be jarring for clients when they meet you in person and can subtly erode trust from the start.
- Choosing a Selfie or Cropped Photo: Never use a selfie or a photo cropped from a group picture as your professional headshot. The quality is typically poor, the lighting is unflattering, and it signals a lack of professionalism.
- Busy Backgrounds or Clothing: As mentioned earlier, distracting patterns, bright colors, or a cluttered background will pull attention away from your face, which should be the focal point.
- Unprofessional Posing or Expressions: A photo where you look overly casual, stern, or have a forced smile will not convey the confidence and approachability needed in real estate.
- Poor Technical Quality: A blurry, poorly lit, or low-resolution image looks amateurish and reflects poorly on your professional brand. Ensure your final image is high-resolution and sharp.
Tailoring Headshots for Different Professional Fields
While this guide focuses on real estate, the core principles apply across many industries. However, the specific tone and style of a headshot can be tailored to fit the expectations of a particular field.
- Corporate/Finance: These fields typically require a more traditional and formal headshot. A studio background, conservative suit, and a confident, serious expression are standard.
- Creative/Arts: Artists, designers, and writers have more freedom to be expressive. Outdoor locations, more casual attire, and creative lighting can be used to showcase personality.
- Tech/Startups: The tech world often favors a look that is professional yet approachable. A headshot taken in a modern office environment with smart-casual attire is common.
- Real Estate: The best headshots for realtors strike a balance. They need to be professional and polished to convey expertise and trustworthiness, but also warm and approachable to make potential clients feel comfortable reaching out. This is why a clean studio shot with a genuine smile is often the most effective choice.
Frequently Asked Questions
What is the best color to wear for a headshot?
Solid, muted colors are almost always the best choice for a professional headshot. Colors like navy blue, charcoal gray, deep green, and burgundy are universally flattering and convey professionalism and trust. They don't distract from your face, which should be the main focus. It's best to avoid neons, busy patterns, and sometimes pure white or black, as they can be difficult to photograph well.
Should I show teeth in a headshot?
Whether or not to show teeth in your headshot depends on your natural smile and the brand image you want to project. A genuine smile with teeth can appear warm, friendly, and approachable. A confident, closed-mouth smile can look equally professional and convey seriousness and competence. The most important thing is that the smile is authentic and reaches your eyes. It's a good idea to take shots with both types of smiles to have options.
What should I avoid in a headshot background?
You should avoid anything in the background that is distracting or unprofessional. This includes clutter, bright colors, complex patterns, other people, or personal items. The background should be simple and clean to keep the focus on you. A solid neutral wall, a professional studio backdrop, or a tastefully blurred office or outdoor setting are all excellent choices.
How to stand out in a headshot?
To stand out, focus on authenticity and quality. A high-quality, well-lit photo where you look genuinely confident and approachable will always stand out more than a low-quality or generic one. Your expression is key; a real smile that connects with the viewer through the camera is your most powerful tool. Choosing an outfit that reflects your personal brand while remaining professional can also help you make a memorable impression.
What not to do in a headshot?
Avoid using an old photo, a selfie, or a cropped picture from a group photo. Don't wear distracting clothing with busy patterns or logos. Avoid unnatural poses or forced smiles. Make sure the photo is not blurry, poorly lit, or over-edited. Your headshot should be a clear, professional, and current representation of yourself that builds trust with potential clients.
Conclusion: Your Headshot is Your Brand
In the competitive world of real estate, your professional headshot is a cornerstone of your personal brand. It's often the first point of contact with a potential client and a powerful tool for building trust before you ever meet. By implementing these tips for professional headshots—from preparing your wardrobe and mastering your pose to understanding the technical details of lighting and background—you can create an image that conveys confidence, professionalism, and approachability.
Remember that you have options. While a traditional photographer is a great choice, modern solutions can provide exceptional results with greater efficiency and affordability. For real estate professionals looking for a fast, high-quality, and cost-effective option, a service designed for your needs is worth considering.
If Realtorheadshot.com sounds like a solution for your needs, try it here to see how you can get 100 studio-quality headshots in just minutes. Investing in a great headshot is investing in your business, and it's one of the smartest marketing decisions you can make.